BRANDING
MOTION
PHOTO
AUDIO
BRANDING
MOTION
PHOTO
INTERACTIVITY, ANIMATIONS, EFFECTS
& CUSTOM FUNCTIONS
ADDITIONAL JAVASCRIPT & CSS
- Additional JavaScript and CSS files have been added to the templates to create more interactivity and interesting effects.
FILES LOCATION
- Some of the additional JavaScript and CSS files are ‘self-hosted’ and have been placed inside the Assets folder for each template.
- These files will be included together in the published HTML. This is done by utilizing the function, Add Files for Upload. To see this function, go to the top menu, File > Add Files for Upload.
- Special JQuery and CSS libraries have been linked to the open source CDN libraries hosting web at cdjns.com.
SCRIPT & LINK TAGS TO LINK MUSE WITH THE ADDITIONAL JAVASCRIPT AND CSS
- Script and link tags have been added inside a special widget called HTML Inserter to link Muse with the additional JavaScript and CSS.
- The widget is located at the top left corner inside every master pages.
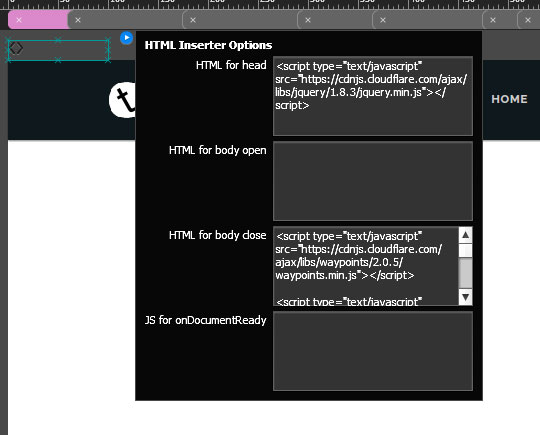
HTML Inserter
CUSTOM GRAPHIC STYLES
THE USE OF GRAPHIC STYLES TO INTEGRATE MUSE ELEMENTS AND THE ADDITIONAL JAVASCRIPT & CSS
- The Graphic Styles function has been extensively utilized as part of the workaround to link objects created in Muse with the additional JavaScript and CSS.
- This function is essential to enable user to assign a unique, custom-created ID name to a particular object in Muse.
- With a unique ID assigned to an object in Muse, the code from the additional script and style will be able to detect it and the particular function created by the code can be applied to the object.
- Tersus offers multiple effects and animations that can be used to create a more interactive website.
- Whenever possible, place the object that needs to be animated inside a State Button first, and then apply the style to the button so that the styling of the objects is not tampered with.
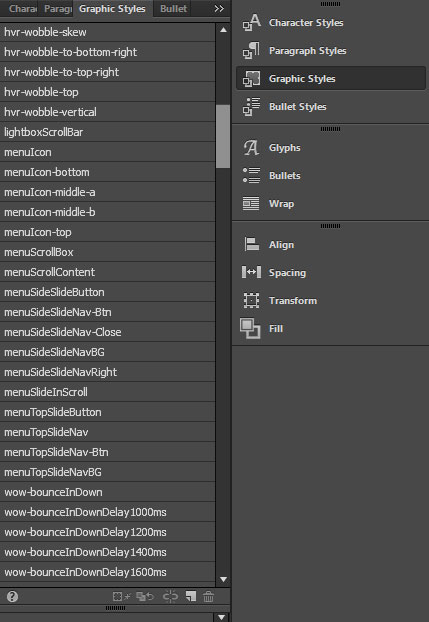
Graphic Styles Panel
FUNCTIONS, EFFECTS & ANIMATIONS LIST
FUNCTIONS, EFFECTS AND ANIMATIONS CREATED WITH THE ADDITIONAL JAVASCRIPT & CSS
- Effects and animations are key elements to create an interesting, interactive website.
- This section will list out special, additional effects, animations and functions that are available in Tersus.
WOW.JS & ANIMATE.CSS REVEAL ANIMATIONS
*Reload page to see the animation
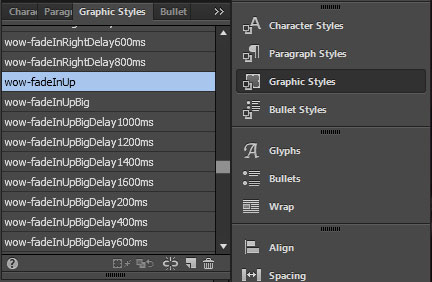
Graphic Styles Name
All styles name start with the word ‘wow’, for example ‘wow-fadeIn’.
How to Use
- Select an object or a whole composition, open the Graphic Styles panel and choose the desired style to apply the animation.
- IMPORTANT TIP. Whenever possible, place objects that need to be animated inside a State Button first, and then apply the style to the button so that the styling of the objects is not tampered with.
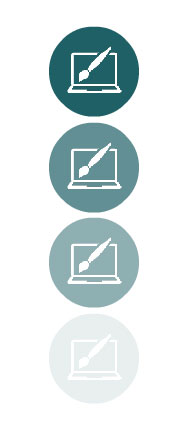
Fade In Up
Reveal Animation
Animation Style in
Graphic Styles Panel
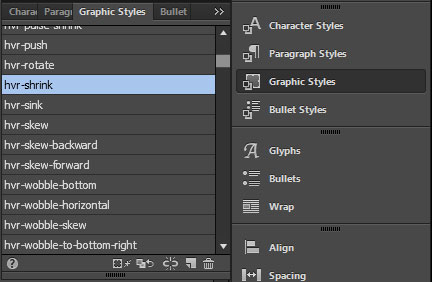
HOVER.CSS ROLLOVER EFFECTS

'Shrink on Rollover' Effects
*Hover on button to see the effect
Graphic Styles Name
All styles names start with the word ‘hvr’, for example ‘hvr-shrink’.
How to Use
- Select an object, open the Graphic Styles panel and choose the desired style to apply the effects.
- IMPORTANT TIP. Whenever possible, place objects that need to be animated inside a State Button first, and then apply the style to the button so that the styling for the objects is not tampered with.
Hover Style in
Graphic Styles Panel

Shrink
Hover Effects
NUMBER COUNTER ANIMATION
Graphic Styles Name
The style name is 'counter'.
How to Use
- Select a text frame with number, open the Graphic Styles panel and choose 'counter' style.
- IMPORTANT TIP. If the text frame assigned with the 'counter' style is placed inside a State Button, the button can be assigned with a reveal animation. Therefore in the browser, on reaching the element, the number will counting up while at the same time be revealed with the selected reveal animation.

Number with Counting Up Animation
Counter Function Style in
Graphic Styles Panel

PROGRESS BARS
GRAPHIC DESIGN
WEB DESIGN
VIDEO EDITING
PHOTOGRAPHY
WEB DEVELOPMENT
GRAPHIC DESIGN
3D DESIGN
VIDEO PRESENTATION
Animated Bar Charts
Implementation
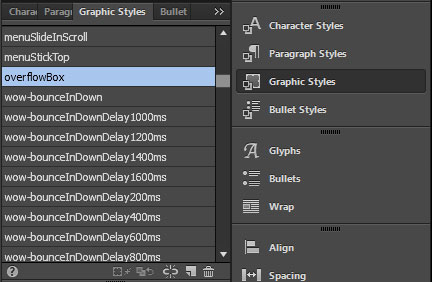
The bar chart elements are animated by assigning them with the Reveal Animation. To prevent the elements from being seen outside of their transparent boundary box, they have been placed inside a transparent State Button that has been assigned with the style 'overflowBox'. This particular style will make sure that even though the animations start from outside of the box, the elements will only be seen once they have reached the inner part of the box.
How to Use
- Select a bar chart rectangle, open the Graphic Styles panel and choose the desired style from the Reveal Animation styles collection to apply the effects.
- IMPORTANT TIP. Please note that once the style has been assigned, the rectangle will lose its current color and will need to be recolored. It is important that the color code is written or save somewhere for reference.
Style for the Container Box
Container Box Created from the State Button Widget
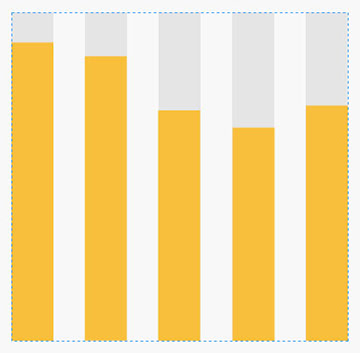
Different Reveal Animations Styles Applied on Each Bar Chart Elements
All Bar Chart Elements are Placed Inside a Special Container Box
fadeInUp
fadeInUpDelay200ms
fadeInUpDelay600ms
fadeInUpDelay400ms
fadeInUpDelay800ms
PARALLAX SCROLLING EFFECTS ON 'FIXED WIDTH' PAGE LAYOUT
- Parallax scrolling effect is the type of effect that make a certain element moves in parallel to the page scroll. NOTE. For opacity scroll effect, instead of moving, the element will fade-in or fade-out depending on the setting.
- The movement speed of the elements can be set to be either faster or slower in parallel to the page scroll.
- In Muse the effect is implemented by using the Scroll Effects function in the Scroll Effects panel.
- The scroll effects function can be further expanded into a few type of effects. in this documentation only the Motion and Opacity scroll effects will be touched as these are the effects that are widely used.
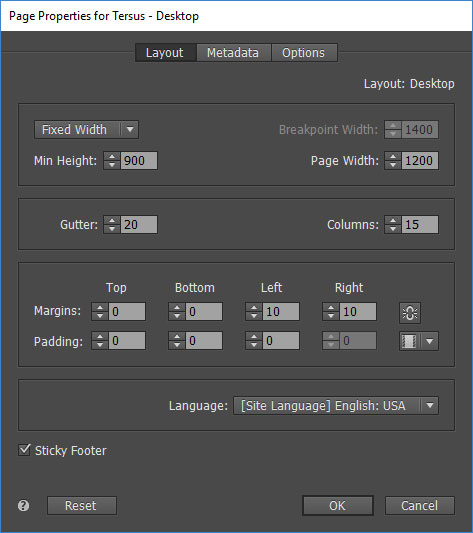
PAGE SETUP (Prerequisite)
- The Scroll Effects function is only available in the Fixed Width type of page layout.
- In the download package, the widest 1200 breakpoint on some templates have been set as Fixed Width so that the Scroll Effects function can be used. For examples of the scroll effects implementation on 'fixed width' page layout please refer to Template 06, 09, 11 & 13.
- The layout setting can be seen in Page > Page Properties > Layout tab.
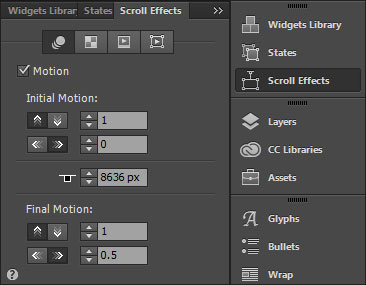
MOTION SCROLL EFFECT ON OBJECTS
- To apply a motion scroll effect to an object, select the object and open the Scroll Effects panel.
- In the panel, select the Motion tab button and tick on the Motion checkbox to activate the scroll effects setting on the particular object.
- It may take some experiments and trial and error before the right settings can be achieved.
- IMPORTANT TIP. For a group of objects, actions such as 'grouping' or 'ungrouping' elements will affect the scroll effects setting. Therefore, make sure that the setting is set once the objects have been properly grouped in the intended manner.
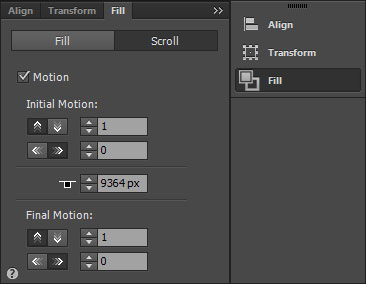
MOTION SCROLL EFFECT ON IMAGE INSIDE A RECTANGLE
- To apply a motion scroll effect to an image inside a rectangle, select the rectangle open the Fill panel. *Not the Scroll Effects panel.
View this LINK to learn how to fill a rectangle with an image.
- In the panel, select the Scroll tab and tick on the Motion checkbox to activate the scroll effects setting on the image.
- Set the setting accordingly.
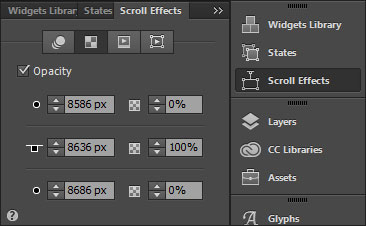
OPACITY SCROLL EFFECT
- To apply an opacity scroll effect to an object, select the object and open the Scroll Effects panel.
- In the panel, select the Opacity tab button and tick on the Opacity checkbox to activate the scroll effects setting on the selected object.
- It may take some experiments and trial and error before the right settings can be achieved.
- IMPORTANT TIP. For a group of objects, actions such as 'grouping' or 'ungrouping' elements will affect the scroll effects setting. Therefore, make sure that the setting is set once the objects have been properly grouped in the intended manner.
MOTION
BRANDING
PHOTO
MOTION WITH OPACITY SCROLL EFFECT
- Both the opacity and motion scroll effects setting can be activated and combined to create another unique effect.
All content © Tersus, 2019. All rights reserved.